
One Friday per month, I’ll write about my favorite things that make life with diabetes a little easier for me.
Not too long ago, it occurred to me that I am very, very, very, very, very strict about following a specific protocol every three days when I change my pod. In fact, it rarely deviates, but when it does (due to circumstances beyond my control), it throws me off track, like, a lot…which is why the way I do it is my favorite way.
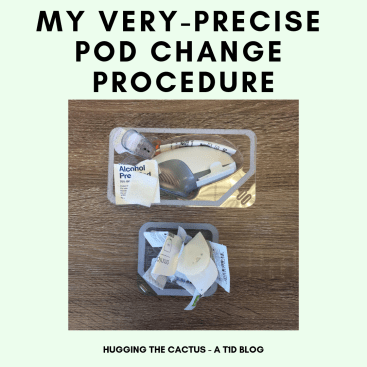
What’s so precise about my pod change procedure? Let me walk you through it…
Step 1) The numero uno thing I do, a half hour before I start my procedure for real, is remove a vial of insulin from the refrigerator. I’ve always been told that it’s important to let the insulin reach room temperature for at least 30 minutes before I start the pod change process. My mother was the one who told me that this step is crucial, because years ago, she’d heard from a representative at Insulet that room temperature insulin works best with pods for whatever reason.
Step 2) Once my insulin has reached room temperature, I set myself up at the island in the kitchen to go through the rest of the process. I make sure I have a totally clear area and ample lighting before I start on step #2.
Step 3) Next, I take an alcohol swab and wipe the top of the insulin vial that I’m drawing insulin from, and then I wipe my new site.
Step 4) Before even touching my PDM, I grab my syringe, stick it into the vial, and suck up the amount of insulin I’ll need for the next three days. This is usually somewhere between 100 and 150 units.
Step 5) This is where I deactivate my old pod, and jab at the buttons on my PDM to start the new pod activation process. The only reason why I get insulin into the syringe first is to minimize the amount of time I spend without a pod on my body. You might be surprised to learn that a short period of time without insulin can make a difference on blood sugar levels, but that’s just the way it is.
Step 6) I fill the new pod with insulin and hit a button to get it to start priming. During the priming period, I use an adhesive wipe around the new pod’s site to help it stick better to my skin.
Step 7) I finish up the process of removing the pod’s needle cap, then the adhesive stickers. I apply it with care to the new site and put pressure on it as I wait for the cannula to inject itself under my skin’s surface. And then I’m good to go!
Of course, I can’t always follow these steps as I’ve outlined them above. And while it messes me up a bit, and I usually have to take a little longer to change it, I roll with the punches and get it done. For instance, when I last visited Disney World, I had to change my pod in one of the park’s dimly-lit family restrooms with my mom using her outstretched hands as my mini work surface…far from ideal, but it was what it was.
Like all things associated with diabetes, I guess that I take comfort in keeping a routine, even with something as minor as a pod change.
