There IS a definitive best time to change a CGM and/or insulin pump site. It’s rare, but when the stars align and both sites need to be changed around the same time on the same day, then that is the magical occasion that allows for a device-free shower. So for me, syncing up pod and Dexcom sensor changes with the time that I plan to take a shower is by far the most wonderful and ideal time to go out with the old, in with the new.
Think about it. These two devices are meant to be worn 24/7, 365. The only time they ever come off my body is so I can rotate sites and put fresh sensors/pods on. This means that I’ve got two medical devices attached to my body at (just about) all times. And I’m totally used to that, except for the times that I somehow forget about my pod and CGM and manage to knock them off my body while changing clothes or, you know, just walking around – and apparently into – doorways/gates/etc.
So when a pod change coincides with a CGM sensor change, I embrace this as an opportunity to enjoy being free from my devices for a short window of time – and for me, the length of time it takes for me to shower is just perfect for taking a break and not having to worry about 1) cleaning around my devices, 2) bumping them into my shower door, or most importantly of all 3) rising blood sugar levels as this short time span isn’t long enough for me to face any consequences of not having an active bolus.
These might seem like trivial reasons to relish a device break so much, but it really is the only time that I am reminded that my body is aided by the devices, not defined by them. It’s nice to see my skin free of them both, even if it’s only for a short while.
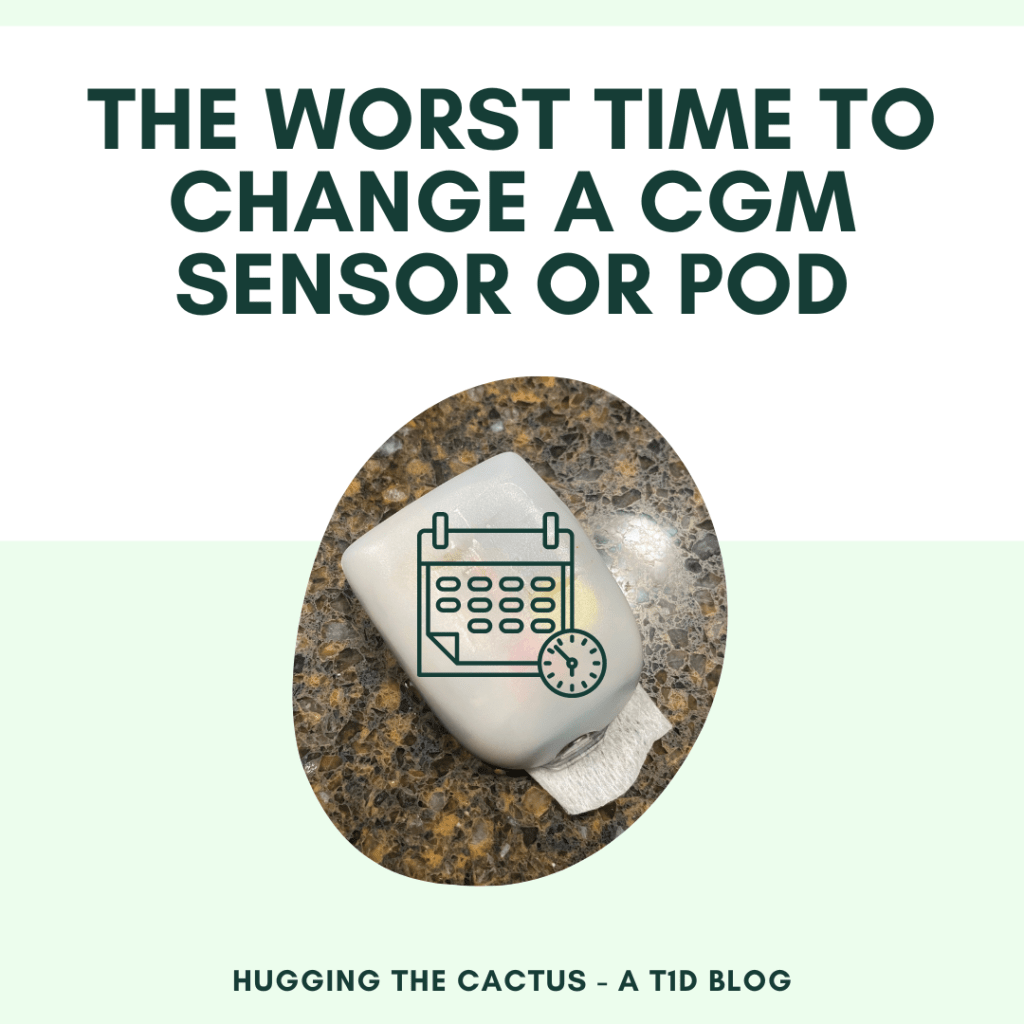
I’m not kidding when I say I think I’ve definitively identified the worst possible time to change a CGM sensor or pod – of course, I can only speak to a Dexcom CGM sensor and an Omnipod, so it’s probable that the worst time to do a site change may vary depending on the specific piece of equipment being used.
But I’ve learned from my own experiences that the worst time to do a site change is within a one-hour window of taking a shower.
Unless you want your pod to fall off and look sad like this one, maybe avoid changing it before taking a shower.
This is because I’ve found that the sensor or pod adhesive needs a solid block of time to firmly adhere to my skin. If I shower soon after completing a site change, I can almost guarantee that the heat and steam from the shower will be enough to dissolve the adhesive and cause the sensor or pod to fall off.
I’ve played around with the timing, too, and I’ve discovered that the more time I put in between a site change and shower, the better – an hour seems to be the absolute minimum. It can be a little inconvenient in the times that I have to forgo my CGM data for a longer period than I’d like, but my goodness, is it wonderful when the stars align and I can take a completely device-free shower. This doesn’t happen often as my sensor and pod change days don’t usually happen on the same day, but it’s undeniably a nice break when it does.
So, there you have it – a word of caution from me, a semi-pro CGM and pod wearer with about a decade’s worth of experience wearing both devices – the worst time to undergo a site change. A pod or CGM failure almost always can’t be helped, but I think it’s worth knowing how to prevent the likelihood of one or both of them needing to be replaced sooner than expected.
“I’m LITERALLY afraid that I’m going to hurt you!!!”
These are all phrases uttered by my dear friend who was ultra-curious about the site change I had to do in the middle of our hangout. She wanted to watch me do it, but I stepped it up a notch by asking her to play a key role in it: I invited her to remove my old pod from my leg.
A routine pod change is no big deal to me.
“Just do it, it’s just like ripping off a band-aid. I can guarantee you won’t hurt me.” I said, in an attempt to reassure her. I also swore I wasn’t lying just to make her feel better, because I’ve rarely ever experienced a pod-rip-off that truly hurt.
“But there’s something in you, right? Like a needle?” Her face creased with worry. I smiled and told her that yes, there was a cannula that was in my skin, but I couldn’t feel it.
“Let me start it for you,” I said, when I realized she still wasn’t quite ready to rip it away. I peeled up an edge of the adhesive and she started squirming.
“You don’t have to do it if you don’t want to -” I said, but just as the words left my mouth, she finally tore off the pod. Much to my chagrin, a drop of blood appeared and she squealed as I began to apologize profusely and explain emphatically that it didn’t hurt, it’s just that sometimes blood will appear and nothing can be done about it.
“I can’t believe you have to do this every 3 days…” she said, her eyes widening in wonder. I told her I’ve done it so many times now – literally just over a thousand, according to my calculations – that it’s no big deal. I’m used to it. It’s just life with diabetes…lots of repetition and more math than I’d like.
I accepted my reality a long time ago, and I’m truly at a place where it’s no big deal.
I knew I wanted to write a blog post about how I forgot to change my pod last week, and I knew I wanted to give it some sort of clever title…
…so out of site, out of mind is what I came up with. After all, my pump site was completely out of sight for me, which is one reason why I forgot it.
You’d think that it’d be impossible to forget about the device I have to wear 24/7, but it’s the sort of thing you get used to pretty quickly.
You’d think that after being on the Omnipod for almost 7 years, I’d never forget that I have to change my pod every 3 days. But just like I sometimes forget to reply to a text message or take a load of laundry out of the dryer, it slipped my mind the other night until just before I went to bed.
That’s when I was faced with a choice: Should I change the pod right then and there before I went to sleep, or let it expire overnight and change it first thing in the morning?
There were pros and cons to each. If I changed the pod before bed, then I wouldn’t have to worry about a screaming pod waking me up in the wee hours of the morning (well, I would if it failed, but the chances of that happening were small). But if I waited until the morning, I would ensure that the 30+ units of insulin still left in the pod would get used up as much as possible. It would also mean that I could push back my regular pod change by one whole day, which sounded appealing – until I remembered that it would mean that I’d have to change my pod on a Saturday when I’m double-hosting family, then friends, at my home.
So I sucked it up and changed my pod before going to sleep, knowing that in an hour and a half it would go off to remind me to check my blood sugar (to make sure that the pod was functioning properly), but feeling okay about this because I’d much rather deal with a gentle reminder over an aggressive malfunction alarm.
Now to the whole reason why I decided to share this seemingly insignificant anecdote in the first place: This is just one diabetes-related decision that I had to make on this particular day. I can’t even tell you how many other choices I had to make prior to this concerning which foods I ate, how much insulin I took, when I exercised, when I ate my meals, and so forth.
Diabetes is a disease defined by decisions. Fortunately, this one about when to change my pod was an easier one to make…but unfortunately, there are many others that are much more difficult. And I think all people with diabetes deserve goddamn decision-making trophies because of the funny conundrum of having no choice but to live life by making decisions.
WARNING: If you are at all squeamish when it comes to blood…then this blog post is NOT for you! I will not be posting any graphic photos or anything, but I’ll be telling a bloody tale that might make the faint of stomach a bit queasy. Read on if you have no fear…
There’s nothing quite like waking up and doing a routine pod change…only to have blood literally pour out of your body the moment you tear your old pod from its site.
Okay, so using the word “bloodbath” in the title might be a gross exaggeration (LOL at my pun because yep it was GROSS), but I digress…blood really did stream in a rivulet down my arm. It sounds wild, but it’s true!
This happened to me a couple of weeks ago. I don’t often change my pod first thing in the morning, but every now and then, I’ll time it so that my pod is set to expire (like, really expire – pods expire for good 8 hours after receiving the initial “pod expired” message on the PDM) as soon as my wake-up alarm goes off. My only goal in prolonging the pod like that is to use up as much insulin as possible that’s left in the reservoir…naturally, I don’t like the idea of tossing a pod when it’s still got 50+ units of insulin left in it.
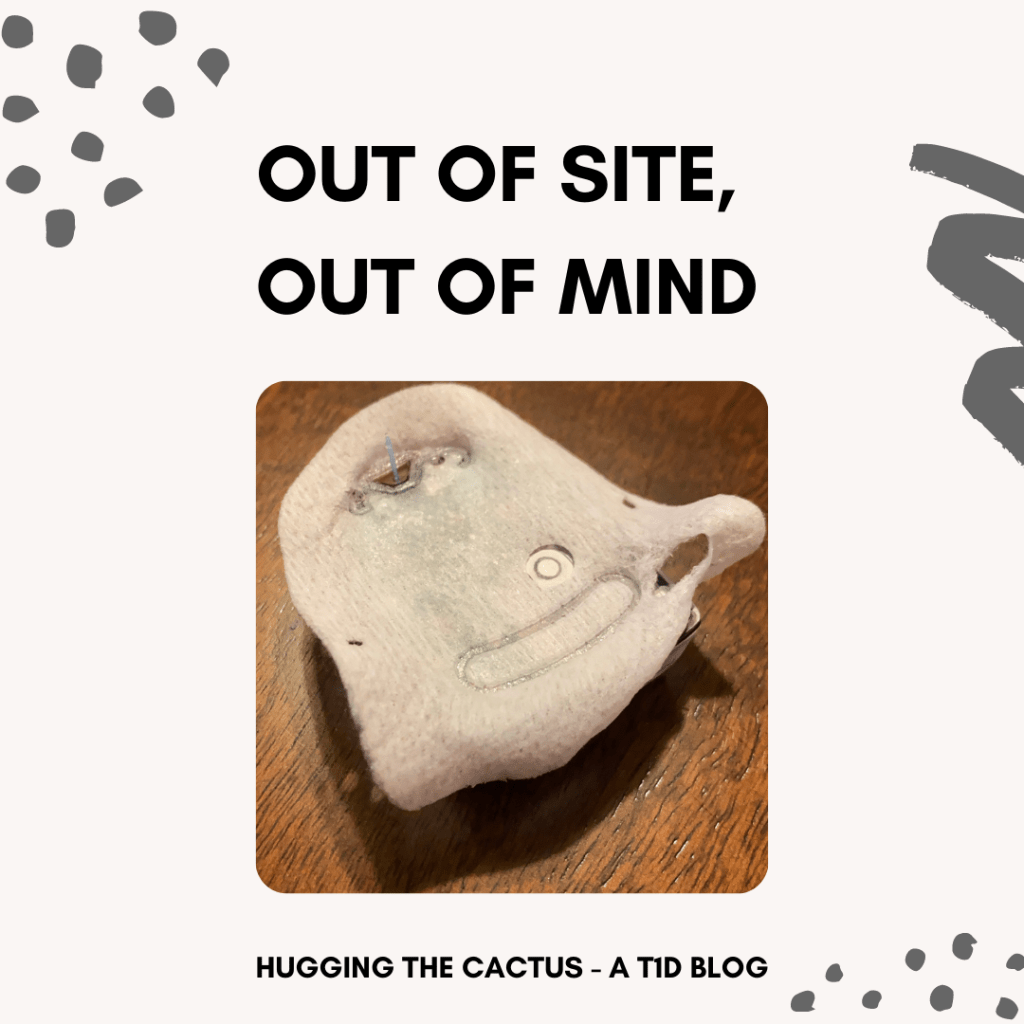
So I literally woke up on this particular morning at 6 A.M. to my pod screaming because I’d hit the 8-hour mark. I rolled out of bed and stumbled over to my mirror so I could have a better view of the pod, which was sitting on the back of my arm, and proceeded to rip the pod off. That’s when I saw blood – not just a tiny drop, but a full-on stream running down my arm!
The ‘betes can get bloody from time to time.
I was surprised, but still had my wits about me to the extent that I was able to run into my bathroom and grab some tissues so I could start wiping up the blood and apply pressure at the site. I barely made it in time – the blood was coming out so fast that drops were falling on the floor and my sink was getting dotted with red. I wasn’t really freaked out, per se, because I knew that if I just pressed hard enough with a tissue, then I’d be able to staunch the wound. And sure enough, within 5 minutes or so, I’d successfully done just that. I peeked under the last tissue I’d used and noticed a purplish mark at the old pod’s site, which indicated to me that I must’ve hit some sort of vein when I had put that pod on. Definitely not intentional, but something I hope to avoid going forward.
And undoubtedly…definitely not my favorite way to start the day!
Whether you’re new to using an insulin pump or a seasoned pro, you might be wondering if there’s a time of day that’s most ideal to do a pod/site change.
And I’m here to tell you…there isn’t a one-size-fits-all answer. (Sorry!)
Like many aspects of life with diabetes, the best time to do a pod change will be different for everyone.
However, I do feel pretty strongly about what works best for me, and I can explain why it does. Maybe that will help you or a T1D in your life decide what makes the most sense for your individual situation!
The best time to do a pod or an insulin pump site change will probably vary for most people with diabetes, just like so many other things.
In my opinion, the best time to change my pod is within the 3-hour window after I’ve eaten dinner. Since I typically eat at about 5:30/6 o’clock, this means that I like to change my pod no later than 9 o’clock at night (but preferably sometime around 8).
Here are the reasons why:
I can take my dinnertime bolus using a pod that I know for certain is acting the way it should.
That timeframe is early enough for me to verify that my new pod is acting the way it should before I go to bed.
Usually, I don’t eat much in the evenings after dinner, so even if my new pod isn’t working right, it’s not too big of a deal because it’s not like I’ll be bolusing for mealtime carbohydrates.
When I change my pod at other times of the day, it interrupts other aspects of my daily flow (e.g., my wake-up time or my work schedule).
There’s something to be said for ending my day with a fresh pod and incorporating the pod change into my bedtime wind-down routine.
Of course, I’ve had to change my pod at less-than-ideal times (I recently did a 6 A.M. pod change because I was deliberately wearing my pod for the maximum 80 hours and it was not my favorite way to start my day). Pods fail or get knocked off and I’ve learned to roll with the punches by having back-ups at all times.
But since I know my best time for a pod change, it’s really nice when I can stick with it…because any reliable aspect of life with diabetes is one that makes it ever-so-slightly more tolerable.
Am I the only T1D out there who feels incredibly nervous about trying new insulin infusion sites?
I’ve been this way as long as I can remember, now that I’m thinking about it. Throughout my childhood, I stubbornly stuck to injecting in my arms, legs, and upper buttocks (tee-hee) because those were the areas I felt comfortable with. I don’t think I even considered jabbing myself in my stomach until I was in my teens, and it was only after I realized the importance of site rotation and reducing scar tissue.
So it’s kind of funny that when I went on the OmniPod just over five years ago, I only used my stomach and my lower back (just above the upper buttocks region, tee-hee) for pod placements. It was partly because my guinea pig – I mean, my mom – used those areas for her pods with success, and also because I was hesitant in the beginning to wear my pods on my arms or legs because of their increased visibility.
It went that way for a couple of year – four basic sites ’round my abdomen – when it occurred to me yet again that site rotation was also important for insulin pumpers, not just MDI-ers (multiple daily injection…ers). So I added my upper arms into the mix, and soon after, my upper thighs followed.
The little diagram (courtesy of Insulet/OmniPod) above only shows a few of the sites that people with diabetes use…over the years, we’ve gotten a lot more creative!
But lately, I’ve shied away from wearing pods on my thighs because the area isn’t overly comfortable. When I roll over in my sleep at night, my pod presses up against my leg and the resulting pressure is just enough to disrupt my sleep and make it difficult for me to find a more restful position to sleep in.
As a result, I’ve started contemplating potential new pod sites, and one of the first places I went to for advice was…Instagram! Because…duh.
The DOC (diabetes online community) on Insta is a natural resource for this sort of thing because many people tend to share photos of their sites. It’s kind of a thing. One simple scroll through my feed taught me that people can get very inventive when it comes to finding new locations to place their CGMs and insulin pump infusion sites.
I saw people wearing Dexcoms on their forearms and calves. I saw pods on backs, calves, and even the upper chest area, the latter of which I found most intriguing. For men, it seems like a very accessible spot that causes little irritation, but for women? How the heck did the T1D ladies I saw with pods on their chest deal with it?
The general consensus, it seemed, was that women wearing pods on the upper chest agreed it was a site with great absorption and minimal discomfort.
I was still skeptical, though. I was worried about how it would look if I was wearing a v-neck tank with my pod poking out of, well, my bra! Then it hit me that my pod garners questions from strangers regardless of where it’s located. Furthermore, people will (probably?) be less likely to ask about it if it’s located on my chest because, um, that’s really awkward. My eyes are up here, people!!!
Then I remembered: I could give the site a try without wasting a pod because I have a demo pack that I got from a diabetes conference awhile back! The demo pack comes with a dummy pod that looks and feels just like a regular pod, but there’s no reservoir built into it, so insulin can’t be injected into it.
So right now, as I’m writing this, I’m wearing two pods: one on my upper arm that’s actually giving me insulin, and a fake one on my chest just to see how I like it. I must admit, so far, so good! I slept comfortably with it on last night and I haven’t had any issues wearing clothing or undergarments with it. I even went for a jog with it on and got pretty sweaty, but it stayed secure/I didn’t feel it bouncing around at all (thought the adhesive got a bit too damp for my liking…it stayed on but if I wasn’t careful I totally could’ve knocked it off).
While I’m still having a hard time wrapping my head around an actual cannula piercing my skin at this location (eeeek), now that I know I can handle the pod itself living there, I’m one step closer to trying (and liking) a site that’s more intimidating to me – a win in my book.
One Friday per month, I’ll write about my favorite things that make life with diabetes a little easier for me.
Not too long ago, it occurred to me that I am very, very, very, very, very strict about following a specific protocol every three days when I change my pod. In fact, it rarely deviates, but when it does (due to circumstances beyond my control), it throws me off track, like, a lot…which is why the way I do it is my favorite way.
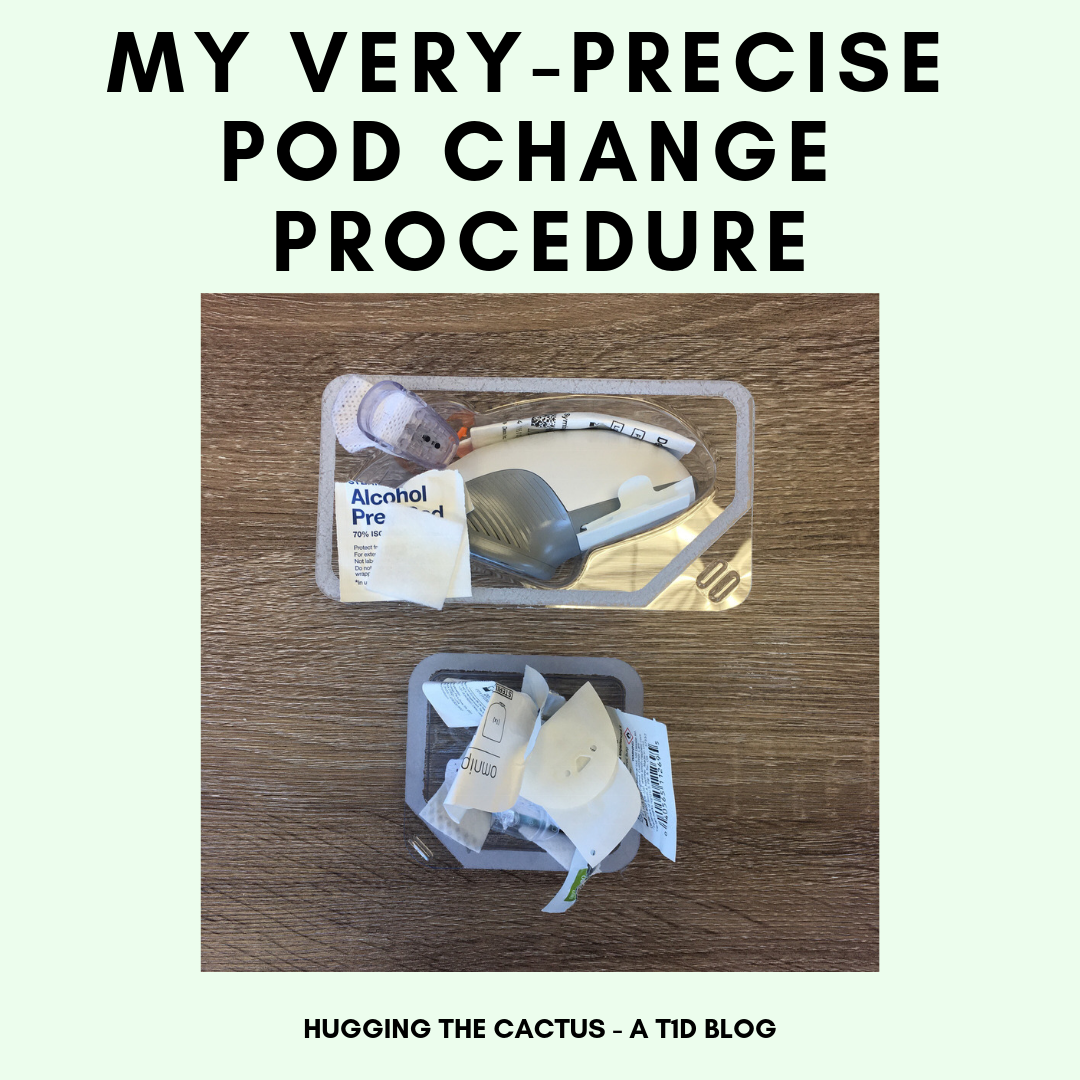
Detritus from a typical set of site changes.
What’s so precise about my pod change procedure? Let me walk you through it…
Step 1) The numero uno thing I do, a half hour before I start my procedure for real, is remove a vial of insulin from the refrigerator. I’ve always been told that it’s important to let the insulin reach room temperature for at least 30 minutes before I start the pod change process. My mother was the one who told me that this step is crucial, because years ago, she’d heard from a representative at Insulet that room temperature insulin works best with pods for whatever reason.
Step 2) Once my insulin has reached room temperature, I set myself up at the island in the kitchen to go through the rest of the process. I make sure I have a totally clear area and ample lighting before I start on step #2.
Step 3) Next, I take an alcohol swab and wipe the top of the insulin vial that I’m drawing insulin from, and then I wipe my new site.
Step 4) Before even touching my PDM, I grab my syringe, stick it into the vial, and suck up the amount of insulin I’ll need for the next three days. This is usually somewhere between 100 and 150 units.
Step 5) This is where I deactivate my old pod, and jab at the buttons on my PDM to start the new pod activation process. The only reason why I get insulin into the syringe first is to minimize the amount of time I spend without a pod on my body. You might be surprised to learn that a short period of time without insulin can make a difference on blood sugar levels, but that’s just the way it is.
Step 6) I fill the new pod with insulin and hit a button to get it to start priming. During the priming period, I use an adhesive wipe around the new pod’s site to help it stick better to my skin.
Step 7) I finish up the process of removing the pod’s needle cap, then the adhesive stickers. I apply it with care to the new site and put pressure on it as I wait for the cannula to inject itself under my skin’s surface. And then I’m good to go!
Of course, I can’t always follow these steps as I’ve outlined them above. And while it messes me up a bit, and I usually have to take a little longer to change it, I roll with the punches and get it done. For instance, when I last visited Disney World, I had to change my pod in one of the park’s dimly-lit family restrooms with my mom using her outstretched hands as my mini work surface…far from ideal, but it was what it was.
Like all things associated with diabetes, I guess that I take comfort in keeping a routine, even with something as minor as a pod change.
I decided to do something a little different and take video of how to change an OmniPod. Rest assured, though, that it does not take 22 seconds – it’s more like a seven-minute process.
Some things you’ll notice about my process:
I fill my syringe with insulin and set it aside before deactivating my old pod. This simply means that I wear the old pod a little bit longer so there’s less of an interruption in time that I go without insulin.
I use a pen to smack bubbles out of the syringe. Air bubbles will inevitably develop when drawing insulin out of a vial, so I find that gently hitting the sides of the syringe with a pen is the most effective way to get rid of the pesky air pockets.
I prep my site with an alcohol swab, followed by a skin-tac wipe. The alcohol merely cleans the site, whereas the skin-tac makes the pod adhere to my skin better and longer.
The new pod activates best when it is adjacent to my PDM. I always place my new pod to the right of my PDM. This helps the PDM register the new pod.
It doesn’t actually hurt when I rip off an old pod. Not sure if you detected my dramatic facial expressing, but I was just yukking it up for the camera. It truly doesn’t hurt, especially if you just remove it in one swift motion.
So that’s it, the full process boiled down into 22 measly seconds. I admit that I kind of had fun making this video, even though the sight of myself sans make-up is semi-horrifying. But give me a break, I was on my way to a Pilates class! And let’s be real, diabetes isn’t always glamorous.